Tuesday, January 10, 2012

Project Life 2011 detail shots

In my last post I showed a video of the first 6 months of Project Life 2011. I wanted to share with you some of the detailed shots as promised. The main reason I wanted to show you these is to have a visual understanding of how simple it is to alter the journaling and filler cards a little. I didn't want Project Life to be a burden so I wanted to complete it as quickly as possible with as little thought as possible. I batch processed a lot of the journaling cards so they were already stitched, doodled or jeweled. These are a few simple ways to alter them. What are your tips for quick alterations? I'd love to hear. Share a link to your blog in the comments so other can see too.

Here I added a 6x12 American Crafts page protector to put my Mother's Day card in. I love Project Life because now I have a spot to store all those items you really want to keep but you don't know where to put them.

I used one of the filler cards as an extra journaling card. As you can see I'm a really big journalling fan. Don't you just love Lisa's jumpsuit? 

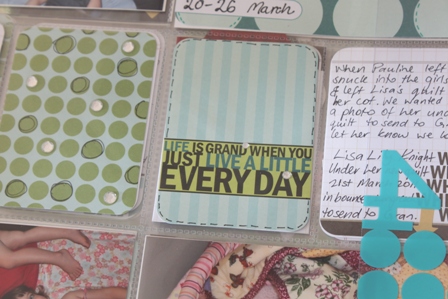
More journaling on the filler cards. There must have been a lot to say that week.

Doodling on the filler cards and some jewels added too.

I laminated the movie tickets. It was the first time Kevin and I had been to the movies in years. It was the King's  Speech. (Fantastic.) It turned the tickets a bit brown but you can still see the words. I hope this will help preserve it a little longer. I know if I hadn't it would have already faded.

This is a divided page protector from American Crafts. I inserted the invitation as well as extra photos from the week. I love these for my regular albums too.

The plane ticket in the divided page protector. I don't know how long that will last. Maybe I should have photocopied instead or scanned it.

Here's the divided page protector in the album. You can't even tell it's there until you go to turn the page. They fit perfectly with the Becky Higgins page protectors.

Extra pieces of memorabilia. An art exhibition we went to, a Valentine's card and an information sheet from school.

Jewels and doodling


My hospital bracelet. I also love this photo of me taking the washing off the line. It's not often I get to  have a photo of me doing such a boring daily task. Thanks for taking that Kevin.

In the top right corner is the FREE photo program photosheet. This one uses 4 photos 3x2. You can use any size combination you like. I often print 2 photos 2.5 x 3.5 using this program. They fit perfectly in the smaller pockets for Project Life.  It is excellent for printing at stores who charge a ridiculous price for doing this for you. I'll be printing a lot of my iPhone photos using this program this year. 


I love this page. It has my dentist invoice (yuck), a note from kindy and a fuel receipt which I had to photocopy as I know it wouldn't have lasted if I hadn't of. I lived where it was 42 degree Celsius during summer and those carbon receipts don't last long in the heat . Lots of the things which will be fun to look back in years to come.  Can you tell how much I love Project Life? I'm so excited about it. It is sooooo good. So simple. So easy.

Saturday, January 7, 2012

Project Life 2011

I have completed most of my Project Life 2011 album. I cannot praise this system highly enough. I was a little skeptical at first as to whether I'd be able to keep it up and whether it would impact on my traditional scrapbooking. Well I must say, apart from the last month with the big move, I have scrapped more than usual this year and I think it is because I don't feel the pressure of being behind. I have so many day-to-day memories recorded that I don't feel like I have to scrapbook every tiny little moment. I feel the pressure has been completely taken off me. I don't feel behind at all and I feel so relieved that Kevin and I have been able to have all of these memories recorded for us not just for the kids. Project Life is our scrapbook. The kids have their own scrapbooks which one day they'll be able to take with them to their lives.

Here is a quick 60 sec video of the first 6 months of our 2011 Project Life.


I will follow tomorrow with some page details for those of you who are interested.

Here are a few of my tips which have made this year's P/L so successful.

  1. I have taken a no-stress approach this year. I haven't minded if I missed a photo a day. I have just made sure I have at least 7 items to include per week, be it receipts, photos, memorabilia, art work, school work, whatever happens in that week. 
  2. I have pre-stamped and day-ed the journaling cards so at the end of each day, or some times during the day, I can whip out a journaling card and get the information down.
  3. I have also tried to include a variety of different types of journaling. Sometimes it's a list of food we've eaten, places we've been, times we've done certain things, other times it's a letter type journal to the kids about what they are doing in the photo, other times it is just a short story of what the photo is about. I think it adds interest. Stops me being bored of how I'm writing. 
  4. I did minimal alterations to the kit. Sometimes I added rhinestones, stitching, doodling, stamps, labels or stickers.